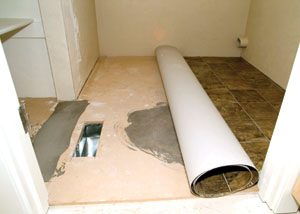
There are plenty of reasons to install sail vinyl flooring, not the least of which is cost savings over other floor materials. Vinyl flooring is bachelor in a huge number of patterns and colors, is easy to clean and is softer to walk on than most other difficult surfaces. Because you can install sheet vinyl over existing vinyl, it offers the option of irresolute design without breaking the depository financial institution.
Vinyl flooring is usually not installed directly over the subfloor in residential applications. In nigh cases four-by-8-pes sheets of particle board or plywood must be installed in preparation for the vinyl floor install.
One of the large considerations when installing different types of flooring in the dwelling house is getting the finished elevations to match. Cement board, thinset and tile add together upwardly to about 5/eight inch. Traditional hardwood flooring is 3/iv-inch thick and carpet with pad is usually between five/8 and 1 inch, depending on the type. Canvas vinyl, however is but about 1/sixteen-inch thick. It needs to be built upward to the same superlative of the other flooring types in the business firm. The thinness and softness of canvas vinyl requires that information technology exist installed on a surface that is very flat and smooth. Installing underlayment in the vinyl areas supplies the elevation, smoothness and levelness necessary for the proper installation of vinyl floors.
Particle Board
1 common underlayment for vinyl floors is i/ii-inch particle board. It's inexpensive, flat, smooth and bonds well to the vinyl adhesives. On the downside, particle board underlayment has very little structural strength. In fact it must be supported by a strong subfloor with express gaps and it can bridge only minor holes.
Another weakness of particleboard underlayment is that it actually doesn't like h2o. It soaks in h2o like a sponge. Water makes information technology swell unevenly, which causes chimera-like irregularities in the surface. Add enough water and the particle lath will fall apart. So, in areas prone to water exposure, don't use particle board.
Plywood
Another common underlayment textile is plywood, which has an advantage over particle board in structural strength and h2o resistance. One concern with plywood, as a walked-on surface, is that voids in the interior veneer layers may allow a depression in the flooring if weight were full-bodied in one spot, such as a big ol' daughter wearing high heel shoes. I suppose that could happen, simply it'south not likely. If this is a concern, marine-grade and underlayment-grade plywoods volition avoid the voids.
Plywood used equally underlayment for canvass vinyl flooring should also take a sanded, smooth surface on the topside. Avoid using materials with distinct raised grain patterns, which tin can affect the stop texture of the canvas vinyl.
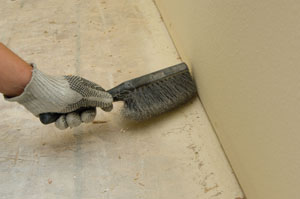
We use a potent-bristle hand brush to get debris out from under the drywall
Make clean Sweep
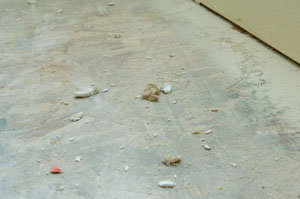
Don't overlook the importance of cleaning the subfloor earlier installing underlayment. Droppings left on the subfloor can cause problems with the underlayment down the road. Whether your project is new construction or a remodel, the odds are pretty good some drywall joint compound (aka mud), structure agglutinative or plaster is nowadays on the subfloor from the wall finishing process. An uneven surface is not the simply business concern. These materials can break down over time, leaving a void between the underlayment and the subfloor. This void can allow noticeable move, floor squeaks or cause fasteners to poke through.
Typical constuction debris on the subfloor includes drywall compound, bits of insulation, expanding cream and drill debris from plumbing and electrical operations.
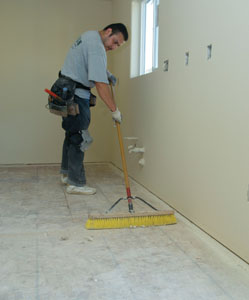
Nosotros use a hand brush with potent beard around the entire perimeter to rake droppings from under the drywall that could cause bug during the install. A thorough sweeping follows. Whoever does the sweeping should watch for boom and screw heads sticking upwards, as well as holes, large cracks, dry rot and other issues that may warrant subfloor repairs.
Like many of our home improvement projects, proper grooming is important to the success of an underlayment install.
Some subfloor materials will soak in water and groovy along the edges. Spotter for this if your project experienced a lot of rain during the framing stage. The swelling results in ridges where the subfloor sheets come together. These ridges can create noticeable humps and bumps in the underlayment. They can besides create voids between the underlayment and the subfloor, which can develop move, floor squeaks and nail pops later.
Nosotros unremarkably handle ridges in the subfloor past setting nail heads with a large dial and grinding, power planing or sanding the ridges closer to flat. A hardwood floor sander works great for this task.
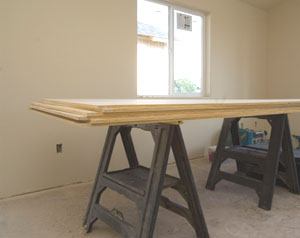
We load our sheets of underlayment material on sawhorses for easy layout and cut.Vapor Barriers
Moisture content in the subfloor should be depression earlier installing underlayment. In some cases a vapor barrier should be used between the subfloor and the underlayment, peculiarly for first-floor applications when using particle board underlayment over a subfloor other than exterior-grade plywood.
If a vapor barrier is not required by code, you need to make up one's mind if the subfloor provides protection against moisture. If it'southward car decking (tongue-and-groove dimensional lumber) with gaps and knot holes, a vapor barrier is a good idea. Vapor barriers are normally polyethylene sheets (4 mil or thicker) or asphalt-layered kraft paper.
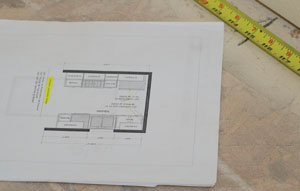
Determining the floor break in kitchen areas often requires a careful exam of the cabinet program.
Floor Breaks
OK, your subfloor is set up, the textile's been selected and protected with the proper vapor bulwark and now you're ready to start running that new round saw, right? Hold on there, Sawyer—you gotta figure out your floor breaks next.
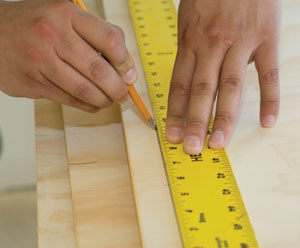
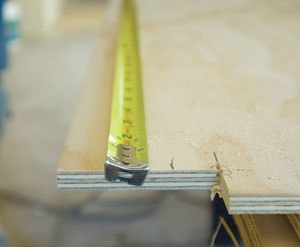
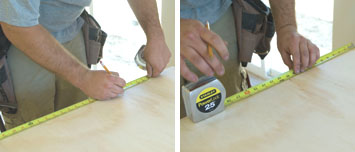
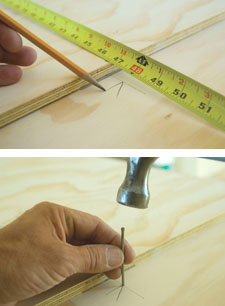
We apply a T-foursquare to mark underlayment sheets for cutting. Expect in the drywall tool area to find a skilful T-square for your underlayment install.
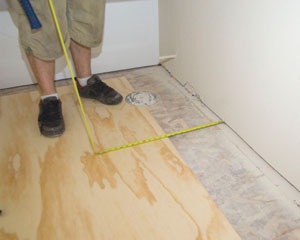
Floor breaks are where the vinyl meets the carpeting (or whatever other flooring is adjacent to the flooring yous are preparing to install on your underlayment). The edge of your underlayment is the place where the vinyl and the carpeting encounter. If, for instance, you are installing vinyl in a bathroom, yous will desire to make the floor break under the door going into the bath.
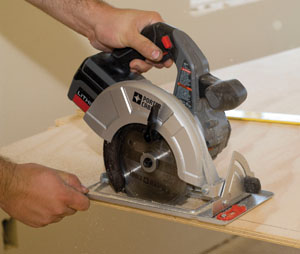
Set the depth of your circular saw to about 1/4″ beyond the material thickness.
If the door swings into the bath, then the flooring pause will extend into the door opening about 1 inch from the face of the drywall inside the bathroom. If the door swings out of the bathroom (such as into an adjacent walk-in closet), and then you'll extend the underlayment into the door opening until it is nigh an inch toward the bathroom from the inside face of the wall of the adjacent room. In other words, figure out where the door is and place the border of the underlayment right under the center of the door panel.
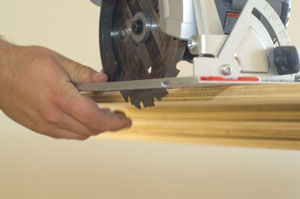
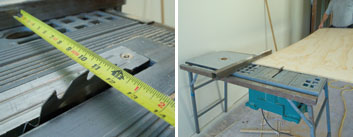
We utilise Porter Cable's new xviii-volt Lithium 6-1/2″ circular saw for our underlayment projection.
At that place are a few exceptions I make to this floor-break-under-the-door rule. Ane is in the case of bifold or bypass doors where there is vinyl on one side and carpet on the other. Considering bifold doors tend to be a bit college off the floor and bypass doors do not line up with each other, it'southward frequently preferable to have the floor break on the inside of the closet area where it is unlikely to exist seen when the doors are airtight. Just imagine the flooring behind the doors peeking out into the living area and y'all'll make the correct phone call.
Afterwards notching the canvass so the floor intermission extends into the door opening, y'all can then layout other cuts as measured within the walls.
When the floor intermission is in an open area such as a transition between a nook expanse and the living room, yous'll accept to make up one's mind how to make that happen and so information technology looks best. If there is an archway or half wall on either side, it'south generally preferable to split up the flooring types in the centre of the dividing wall or arch or cased opening where there is no door.
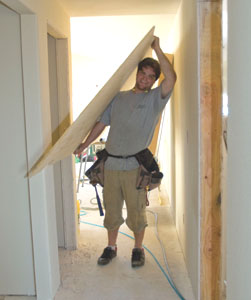
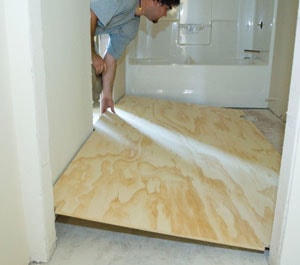
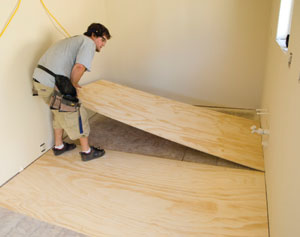
The preferred method for carrying a sheet of underlayment is 1 hand under and one over. This gives you good command to negotiate hallways and door openings.
In the case of a kitchen or bar area, you need to know the cabinet layout then you can brand the floor break at the edge of the exterior chiffonier box. If there are cabinets on both sides of the opening, plan the floor break to get in a direct line betwixt the exterior corners of each of the outside toe kicks.
Be conscientious not to damage walls and tubs as you lot maneuver sheets into place.
Sheet Orientation
One time y'all've decided on the floor breaks, you can measure, cut and install your underlayment. In most cases I begin with the biggest slice I can fit in a room (ordinarily a 4-by-eight-pes sail) right in the door opening so you avoid putting seams in the areas that will be walked on most.
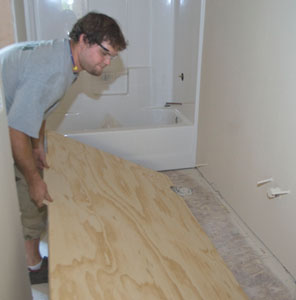
Go on the piece on plane with the downwardly edge parallel to the wall every bit you ease the slice into position.
Whenever practical, run the long management of the underlayment sheets in the opposite direction of the subfloor cloth so they cross each other. This adds to the floor's structural strength. Avert placing sheets of underlayment in such a way that the seams of the underlayment correspond or line upwards with the joints in the subfloor.
Check the piece for parallel to the walls before tacking it into place.
If the floor pause takes place in an area other than under a door, I prefer to lay the first sheets along the flooring break edge and work back into the vinyl area of the room. This allows me to cut and fit the smaller pieces against the walls and nether the cabinet areas where the tolerances are less demanding. Too, if you first with a nice directly factory border forth a carefully established floor break it will greatly improve the transition between flooring types.
After establishing the floor interruption with the exterior piece, add material to the inside of the room to complete the install.
Tolerances
Whenever possible, plan your cuts and so the factory edges of the underlayment come together, and place the saw-cut edges on the perimeters against the walls. Give yourself 1/8 to one/iv inch of room along the walls. In fact, you tin go out gaps the thickness of the base board. It's better to accept a little wiggle room than to scratch up the walls.
Fastener spacing should be approximately three″ on the outside perimeter of each piece.Leave a small gap betwixt the underlayment and showers or tubs to avert squeaks.
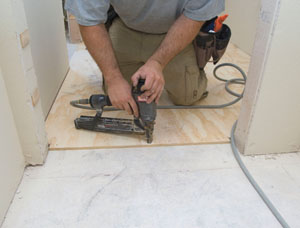
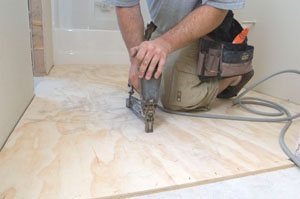
As y'all install the pieces, move them away from the wall and tighten the joints out "in the field." When the pieces fit and the joints are tight, tack them in place with a ring-shank smash or with the staple gun.
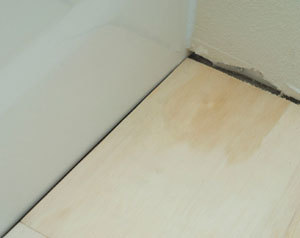
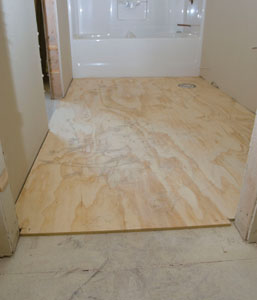
Bathroom underlayment.Floor breaks at door openings should line up with the center of the door itself.
Leave a little room (1/16 inch or so) along fiberglass showers and tubs. Even a little flooring flex can crusade a squeak where the underlayment rubs these fixtures. If you are installing vinyl flooring in a large expanse where light from a patio door shines across the surface, it's a good idea to employ carpenter'south glue at the seams between pieces to ensure that they stay well connected to each other too equally to the subfloor.
Fastener spacing should exist approximately 3 inches on the outside perimeter of each piece.
Nailing patterns should be 3 inches on the perimeters and vi inches in the field. Earlier nailing off the pieces in the field, drive a few fasteners with plenty of weight nigh the nailing spot to make certain the underlayment is against the subfloor.
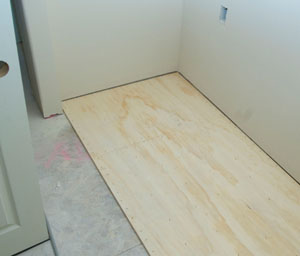
This utility room flooring break is well behind where the bifold doors volition be, so the flooring cannot exist seen when the doors are closed.
Proper grooming of the subfloor, careful consideration for flooring breaks, tight seams and thorough fastening will ensure that your underlayment will provide a good platform for your sheet vinyl floor for years to come.
Big Cuts/Small Saw
You can cut a piece wider than the chapters of your small table saw past marking the desired width on the slice and measuring to the mark from the opposite border. Set the saw to cut off the proper amount by measuring to the outside of the saw bract. This approach allows yous to use the fence on the table saw for a nice direct cut even though the finished piece (on the other side) is wider than the saw's capacity.
Cordless Reward
1 of the biggest advantages to cordless technology is being able to easily have the cutting tool to the room where a tricky slice needs to be cutting for installation. Some underlayment pieces are similar jigsaw puzzle pieces, which makes a cordless jigsaw an ideal tool to brand the piece fit the puzzle.
Starting with a basic rectangular piece, you can marker your measurements directly onto the slice every bit yous take them. This avoids the need to write downwards measurements or to depict a diagram. You can cut out openings*, make adjustments, and test fit your piece without always leaving the room.
*Tim, yous really should use a sawhorse for this operation.
Out of Bounds
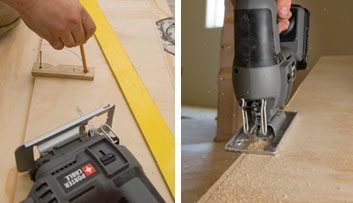
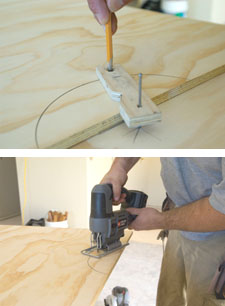
When the center of a toilet drain falls outside of the sheet you are working on, you can extend the layout onto the sail underneath and ballast your pivot nail in that location.
With the pivot boom in the sheet underneath, y'all can use your 3-1/2-inch radius jig to draw an arc for the toilet drain cutout.Cut out the toilet drain opening with a jigsaw.
What About Tile Flooring Underlayments?
Some tiled floors final for hundreds of years and others start to bear witness cracks after only a few months. Why? The reason can exist best summed up in ane word—uncoupling.
An uncoupling layer allows the tiled surface to move independently of, or be 'uncoupled' from, the subfloor. In recent years many installers have been inappropriately working to create a more secure bond by adhering tiles straight to the subfloor. The problem with this "direct bond" arroyo is that the subfloor expands and contracts due to changes in wet and temperature, which exerts incredible stresses on the tile layer. The tiles and grout don't expand and contract at the same rate as the subfloor, so tiles and grout are both vulnerable to dandy and buckling.
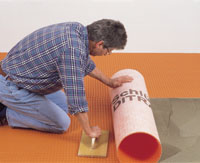
And then, what virtually those 100-yr old floors that still look great? "The theory is simple," says Peter Nielsen, technical director for Schluter-Systems. "For centuries tiles were successfully installed on a layer of sand, which worked very effectively as an independent uncoupling layer between the structural base and the tile floors. In more recent times, a thick wire-reinforced mortar bed placed over a skid-sheet was used to accomplish this same function. Although highly successful, these traditional methods accept the limitations of beingness thick, heavy and challenging to install, and they are not at all suited to modern habitation construction."
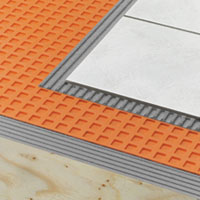
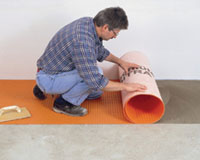
Schluter-DITRA is an uncoupling membrane engineered for modern construction techniques. DITRA is only one/eight-inch thick, weighs just two ounces per foursquare foot and is like shooting fish in a barrel to install. The matting allows structure materials beneath the tile to exhale, just information technology is impervious to h2o so floors and ceilings volition not be damaged by spills and leaks. The system is designed for use on all of the virtually commonly used subfloor materials—plywood, OSB, concrete and gypsum-based screed.
The uncoupling membrane is adhered to the surface beingness tiled using a layer of thinset adhesive applied with a one/4-inch V-notch trowel. The tile is then adhered to the uncoupling membrane using another layer of thinset. Too available is DITRA-XL, which is v/16-inch thick to allow for even transitions betwixt typical ceramic tile and 3/4-inch thick hardwood floor. For more information, visit world wide web.schluter.com.
Special Care for Basement Remodeling
When remodeling a basement into a living space, consider the advantages of an insulated subfloor to increase the room's comfort level. For instance, concrete transfers moisture, and so you should never install rug or wood directly over the bare slab of a basement; they'll ruin in no time. Vinyl or linoleum flooring in a basement can transfer cold temperatures from the floor to the room.
One solution to warm, comfortable basement floor is the Barricade Modular Subfloor from OvrX. Barricade is an insulated subfloor panel arrangement specifically designed to cover concrete floors and provide warmth from real insulation. The system comes in 2-by-ii-foot panels that apace and easily intstall using a tongue-and-groove organisation. The OSB panels are ane.125 inch thick and backed with a layer of airtight-prison cell polystyrene insulation achieving an R value of 3.
Also available are the Barricade wall panels, which measure eight-by-2 feet and are backed with XPS airtight-jail cell Styrofoam. The wall panels are two.44 inches thick with an insulation value of R-12. The basement wall panels and subfloor system can exist installed equally a system or can be installed separately. Together you go the greatest benefit as a barrier that protects against air and water infiltration, intrusion from foundation leaks, sump pump failures and flare-up pipes, besides as extreme hot and cold temperature transfer through walls and floors. For more data, visit world wide web.ovrx.com.


0 Response to "How To Install Subfloor For Vinyl Flooring"
Post a Comment